What is a reverse proxy, and why might you want to use it?
Reverse proxy is a software engineering design pattern that can connect many apps under the same host.
You can visualize this as a large building. There can be many different rooms under the same roof with different functions, but they belong ot the same building.
You can use a reverse proxy to have two or more front-end frameworks under the same domain.
This is useful for gradual migration when migrating large projects page by page, functionality by functionality.
Your new and old frameworks can share the same authorization cookies and SSL certificates, making the transition seamless for the users. They can view pages in both frameworks by navigating through links without loosing their logged-in session.
In this article, I’ll walk you through building your Reverse Proxy using Nginx, Next.js and Svelte.
End result
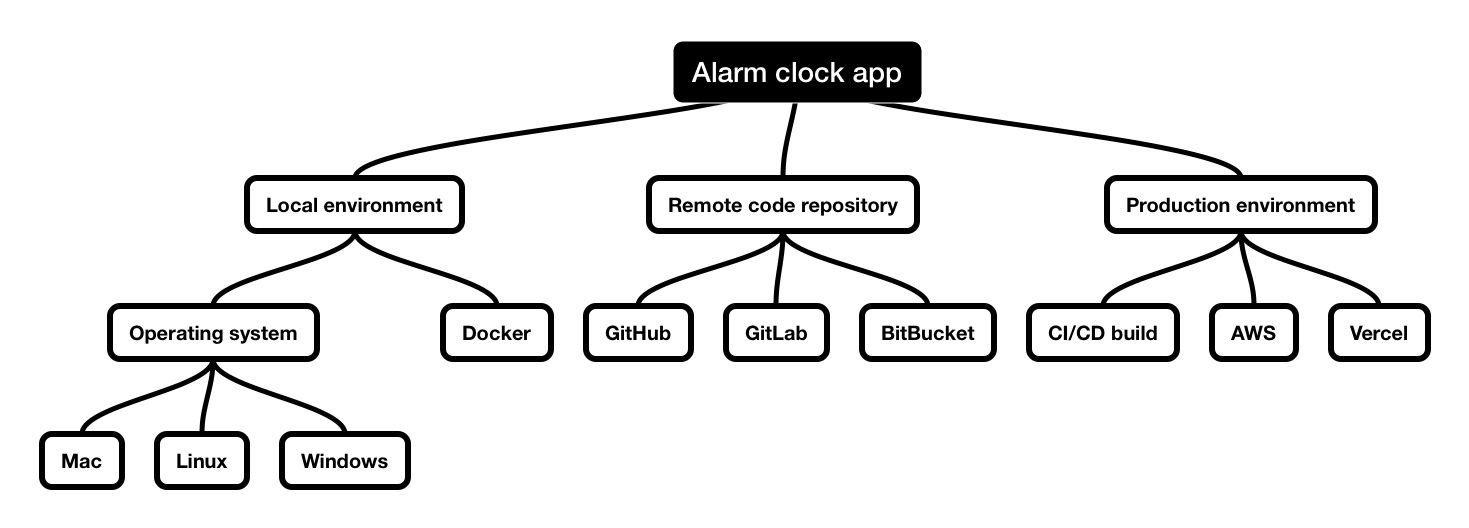
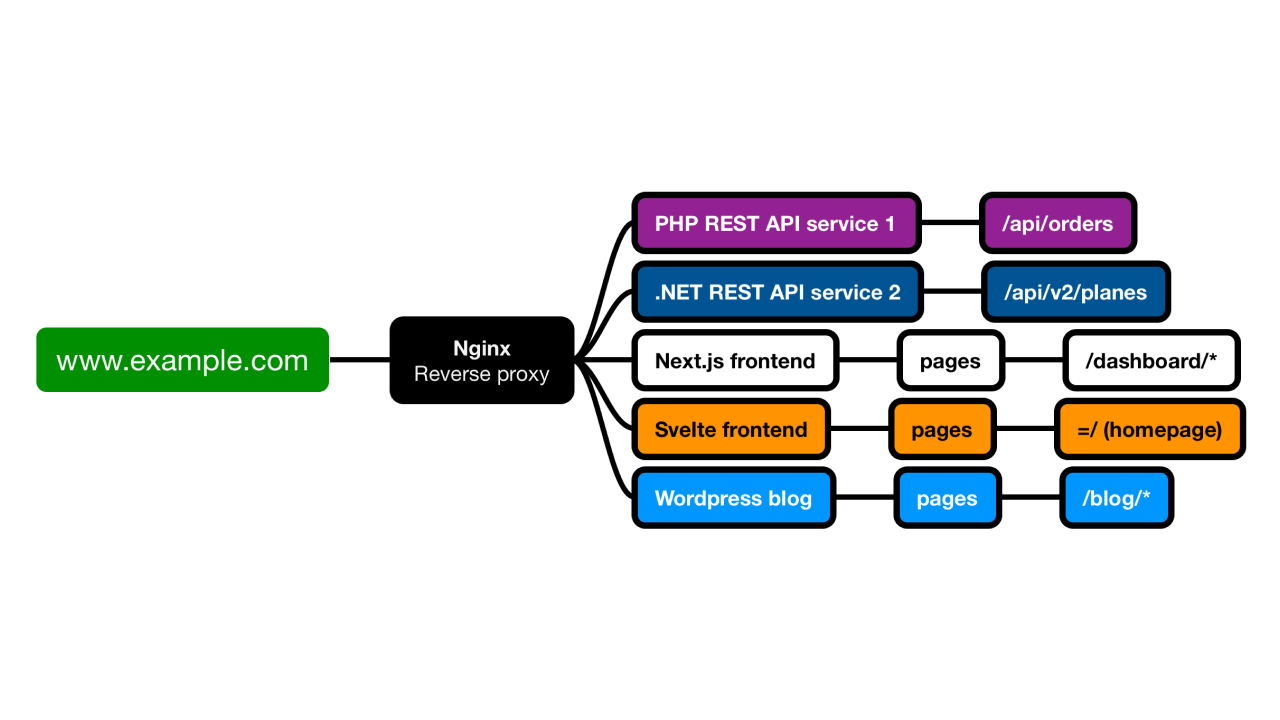
Let’s imagine a fictional architecture that has the following services:
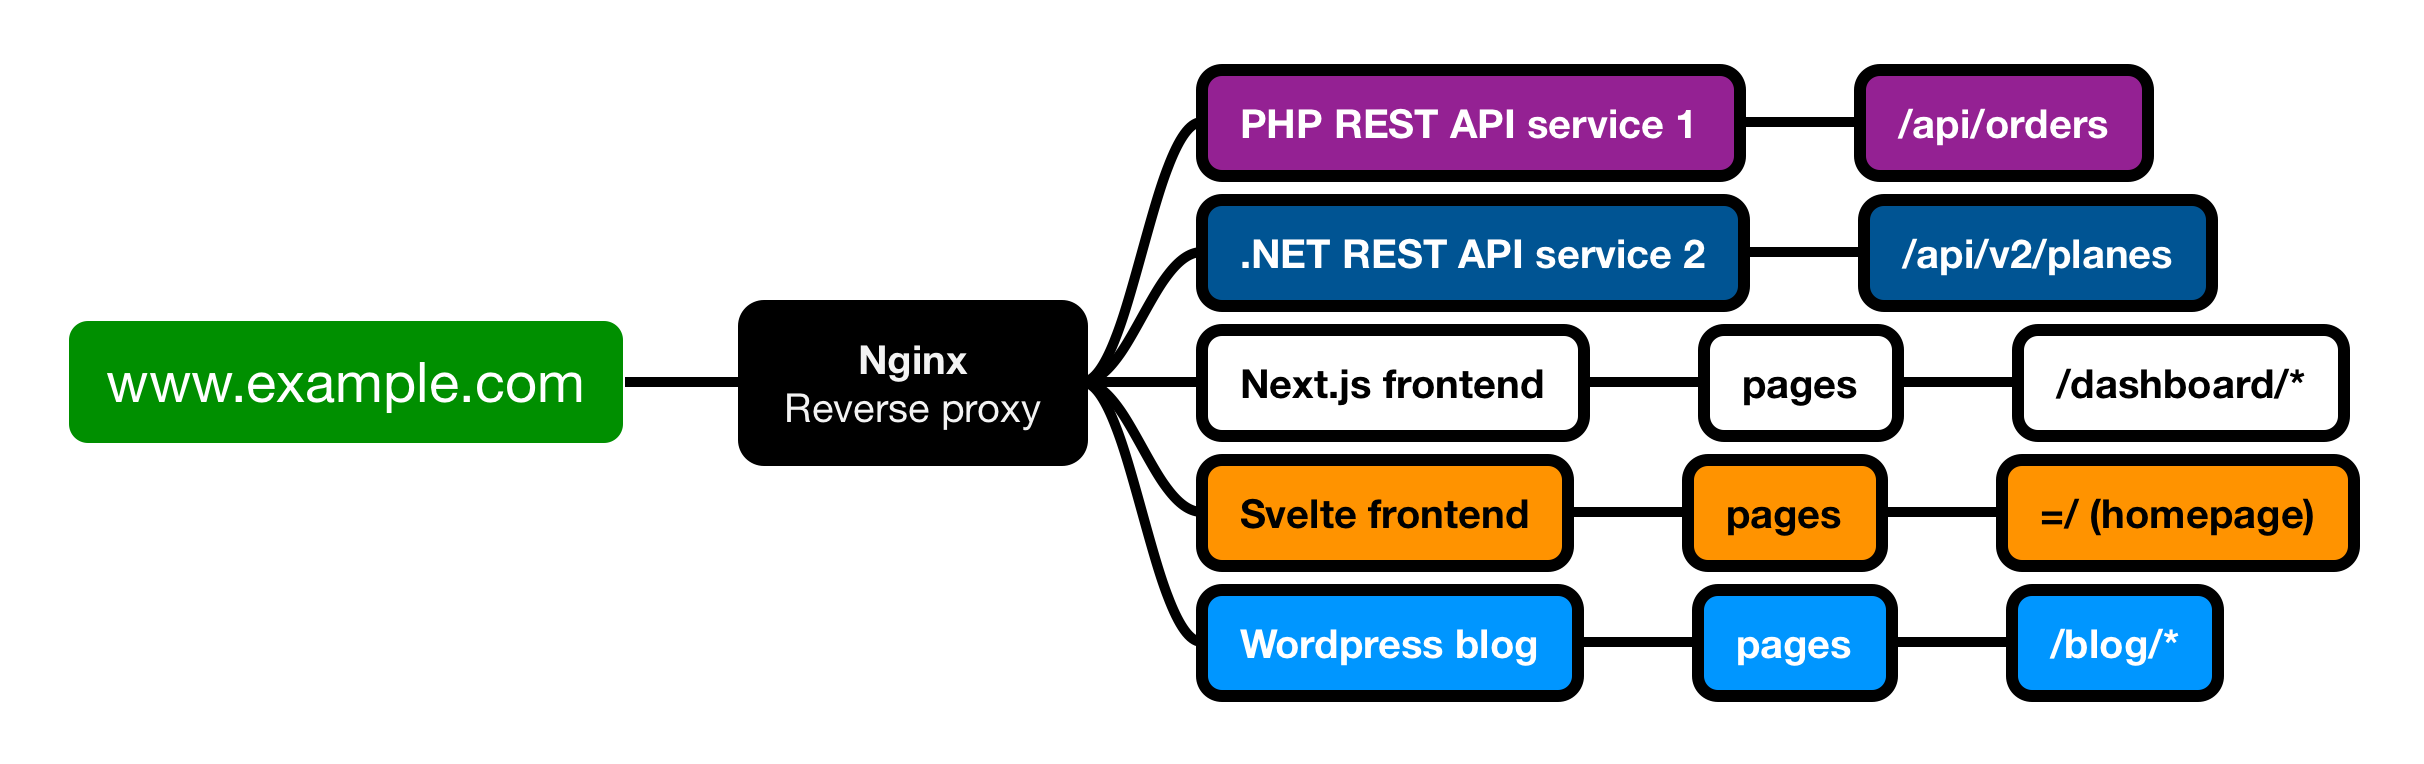
In the graph above, you can see a system comprised of the following parts:
- PHP REST API
- .NET REST API
- Next.js frontend
- Svelte frontend
- WordPress blog
All of these services can easily share host and authorization information using a Reversed Proxy. I picked the Svelte and Next.js parts in this guide to illustrate how it works.
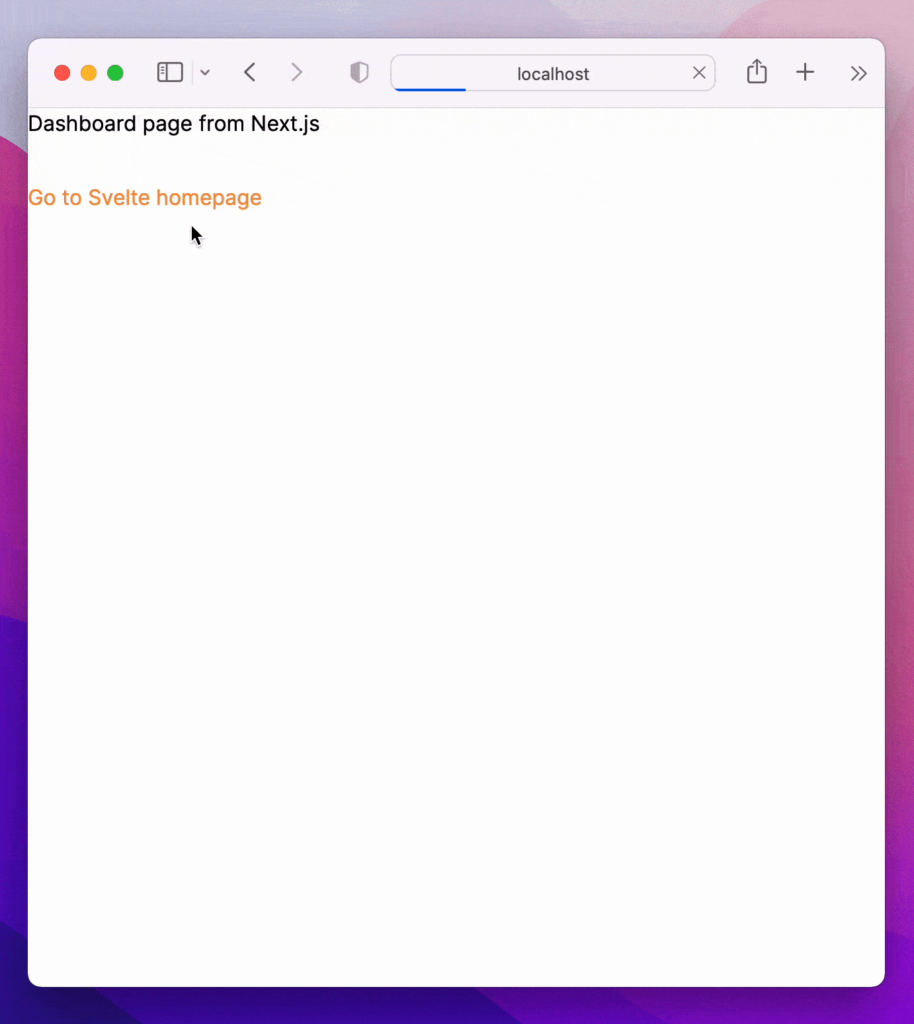
In the GIF below, you can see Next.js and Svelte Kit apps under the same domain.
Svelte code:
<h1>Svelte landing page</h1>

<p>Visit Next.js <a href="/dashboard">Dashboard</a></p>
src/routes/+page.svelte
Next.js code:
import Link from "next/link";
import React from "react";

export default function Page() {
  return (
    <div className="space-y-8">
      <p>Dashboard page from Next.js</p>

      <Link href="/" className="inline-block text-orange-400">
        Go to Svelte homepage
      </Link>
    </div>
  );
}
src/app/dashboard/page.tsx
As you can see, the code is entirely different. The only thing connecting these two frameworks is an HTML link. It’s all we need, because both Next.js and Svelte are essentially one app under a Reversed Proxy. Let’s explore how it’s possible.
What is Nginx?
Nginx is a popular open-source web server and reverse proxy. It is known for its high performance, stability, and ability to handle significant traffic. Nginx can be a load balancer, HTTP cache, and mail proxy. It is commonly used in modern web architectures to improve scalability and reliability.
How to install nginx?
Let’s start by installing Nginx on your machine. To install Nginx on a Mac using Brew, follow these steps.
If you’re not running Mac, here are some links to articles that can help you install Nginx on different platforms:
Alternatively, you can install Nginx on your computer using Docker.
Step 1.
Open Terminal and run the following command to install Homebrew (if you haven’t installed it already):
/bin/bash -c "$(curl -fsSL <https://raw.githubusercontent.com/Homebrew/install/HEAD/install.sh>)"Step 2.
Run the following command to update Homebrew:
brew updateStep 3.
Finally, run the following command to install Nginx:
brew install nginxStep 4.
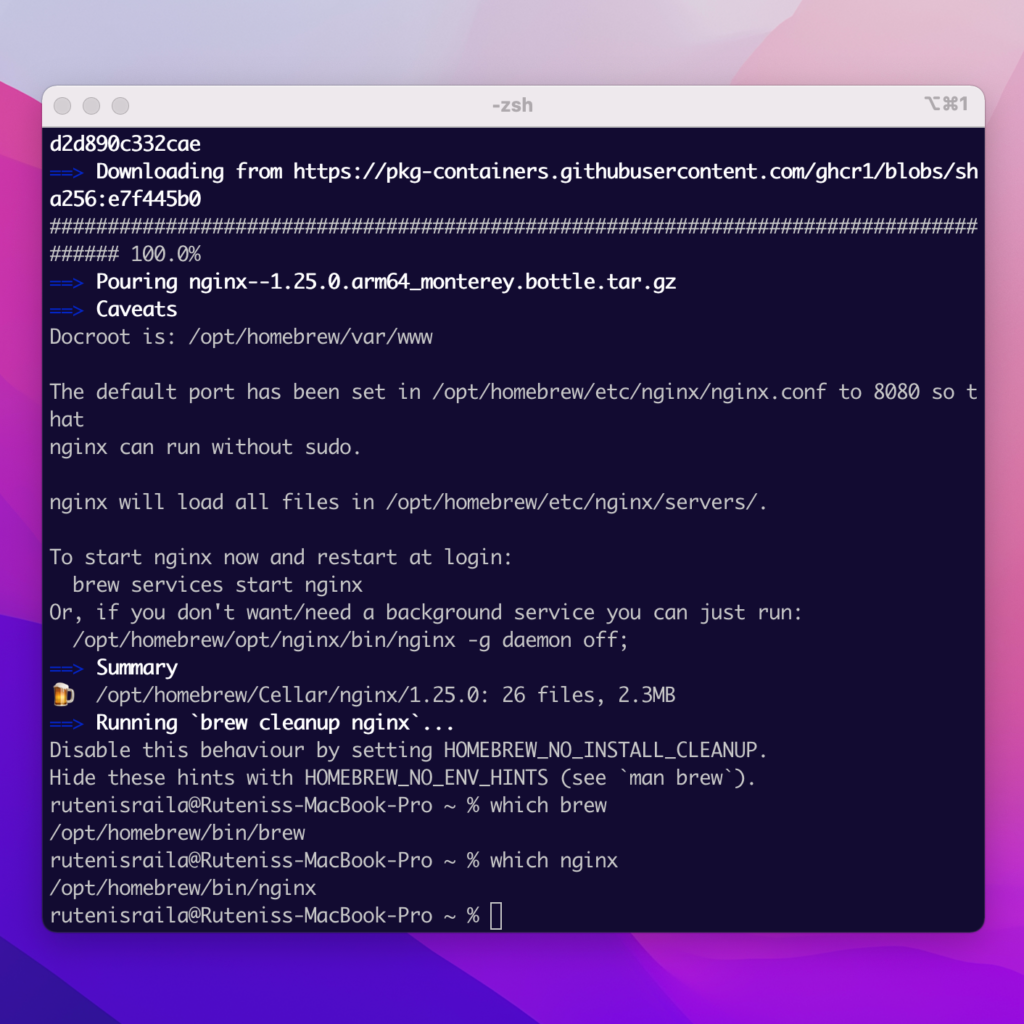
You can verify that nginx by running:
which nginxYou can see that, in my case, it’s located in the following location:
How to configure the Next.js proxy with Nginx?
Locate to where your nginx is installed by running the following in your terminal:
cd /opt/homebrew/etc/nginxIf you have Vscode installed, you can open the Nginx folder by typing this command in your terminal:
code .You should be able to see Nginx configuration on your machine:

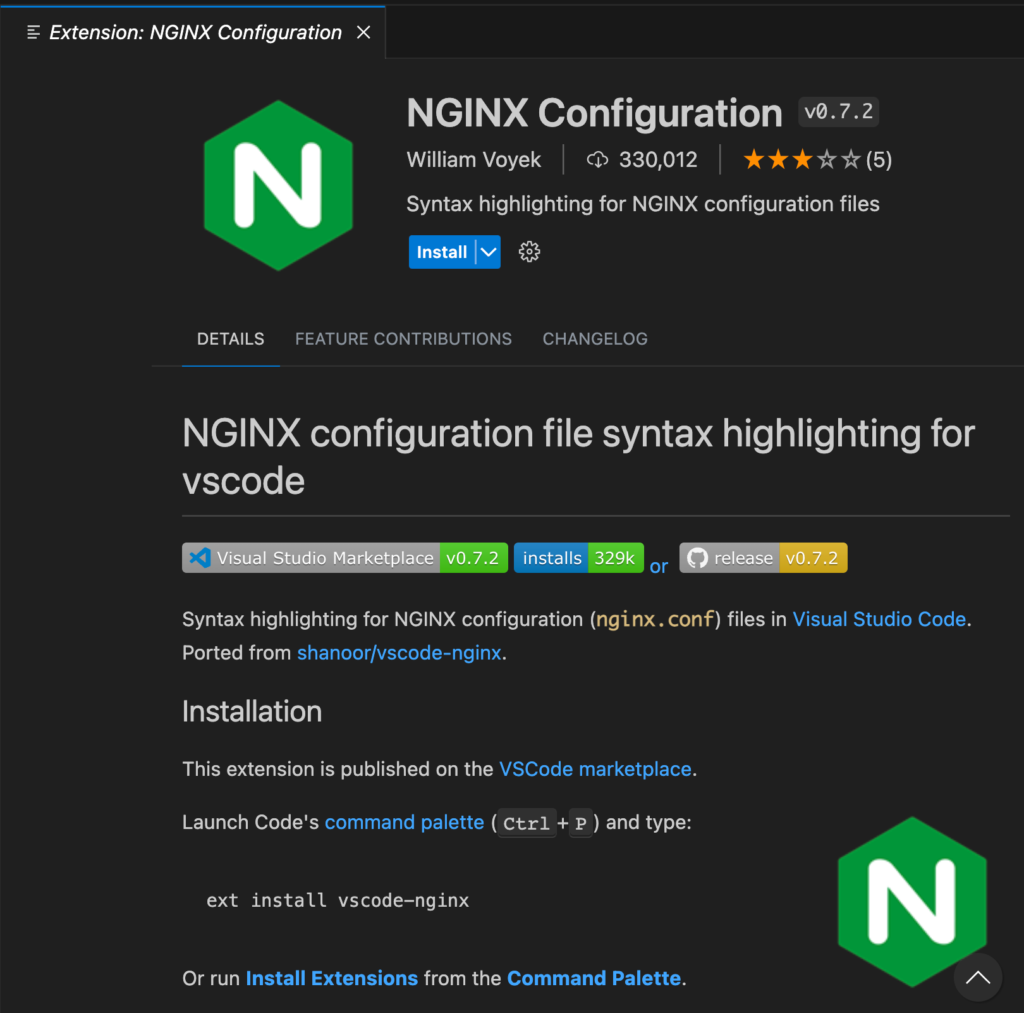
TIP: I find that installing a .conf file extension for Vscode makes it much easier to read Nginx configuration files. This is the one I’m using:
Add Nginx server configuration
Let’s connect Next.js and Svelte.
worker_processes  1;

events {
    worker_connections  1024;
}

http {
    include       mime.types;
    default_type  application/octet-stream;

    sendfile        on;
    keepalive_timeout  65;

    # Set proxy headers
    # They will be used for proxy_pass.
    proxy_set_header Host $host;
    proxy_set_header X-Real-IP $remote_addr;

    # Websocket support
    # Used for local Next.js development.
    proxy_http_version 1.1;
    proxy_set_header Upgrade $http_upgrade;
    proxy_set_header Connection "upgrade";


    server {
        listen 80;
        server_name localhost;

        # Redirect homepage to Svelte.js.
        location = / {
            proxy_pass http://127.0.0.1:5173/;
        }


        # Redirect Next.js assets to Next.js.
        location ~ ^/(_next|__next) {
            proxy_pass http://localhost:3000;
        }

        # Redirect all other pages, API routes and assets to Next.js.
        location / {
            proxy_pass http://localhost:3000;
        }
    }

    include servers/*;
}
nginx.conf
After adding this configuration, you should be able to visit both apps under the same localhost domain.
Nginx commands
You can use these commands to control the Nginx server:
// start
nginx

// stop
nginx -s stop

// inspect
nginx -t

// reload
nginx -s reload
How to deploy Nginx Next.js proxy?
You can deploy Nginx using the following services:
- Use a cloud hosting service like Amazon Web Services (AWS) or Google Cloud Platform (GCP). These services allow you to quickly and easily deploy Nginx to a virtual machine or container.
- Use a container orchestration system like Kubernetes to manage your Nginx deployment. This can help automate many deployment aspects, such as scaling and load balancing.
- Self-host Nginx on a dedicated server. This option is relatively simple and allows for more deployment control than cloud services, but it may require more technical knowledge to set up and maintain.
- Deploy Nginx to your server or physical hardware. This requires more setup and maintenance but gives you complete control over your deployment.
Summary
Revese Proxy is a powerful tool for migrations. When working with large projects, you’ll often need to migrate from one technology to another while keeping some parts of the old one fully functional. This is where a Reverse Proxy shines.
However, remember that it will increase the complexity of your codebase, so make sure to use it when only you need to.
Thanks for reading! See you next week.